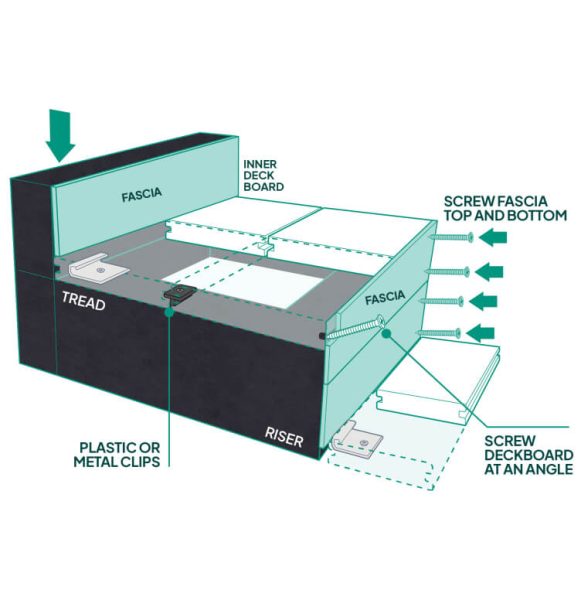
Installing Decking Board Steps and Fascia
Carefully plan the area checking all measurements. Measure and cut deck boards and fascia where required and where deck boards or fascia meet leaving an 8mm expansion gap.

1. Fix starter clips to the inside of the tread every 300m max intervals. Screw through the hole on each starter clip with the screws provided ensuring that the screw is fully screwed into place to prevent catching on the deck board underneath.
2. Fix the inner deck board by pushing into the starter clip. Check the deck board is securely in place before continuing.
Using Metal Clips
- Fix metal clips to the inner deck board at every joist with the screws provided.
- Place the metal clips into the deck board groove and screw the other side down through the hole.
Using Plastic Clips
- Fix plastic clips to the inner deck board at every joist with the screws provided.
- Place the side of the plastic clips into the deck board groove and screw down half way ensuring they are upright.
- Screw down fully when the next deck board is in place.
Last Deck Board
- Fix the last deck board as normal finishing flush with the deck board riser but do not fix any clips to the outer groove. Pre-drill holes and screw through the outer groove at an angle and into the joist. Start at 80mm approx then at every 300mm approx intervals.
Fascia
- Fix the fascia to the riser by pre-drilling holes top and bottom and screwing through the face of the fascia. Start at 80mm approx then at every 300mm approx intervals. Ensure that the fascia finishes flush with the top of the deck board and leave a 8mm expansion gap when joining fascia.
